

Newlands Cricket Ground, Cape Town | 27–31 October 2026
Result: South Africa won by 176 runs
Series result: South Africa won 2–1
Player of the Match: Simon Harmer
Player of the Series: Marco Jansen
1. MATCH OVERVIEW
The third Test between South Africa and Australia at Newlands was a contest of momentum, resilience and tactical execution. Australia appeared to take control after securing a 100-run first-innings lead, but South Africa’s response in the third innings completely changed the direction of the match.
South Africa’s second-innings total of 387 was built around crucial contributions from Ryan Rickelton and Wiaan Mulder, both of whom scored centuries. Their partnership and ability to absorb pressure allowed the hosts to establish a target of 288.
Australia’s final-innings batting collapse then handed South Africa a 176-run victory and a 2–1 series win.
2. INNINGS-BY-INNINGS ANALYSIS
| Team | First innings | Second innings |
|---|---|---|
| South Africa | 329 | 387 |
| Australia | 429 | 111 |
South Africa – First Innings: 329 all out
South Africa’s opening innings was built around contributions from Aiden Markram, Marques Ackerman and David Bedingham.
- Aiden Markram – 78 (141)
- Marques Ackerman – 95 (94)
- David Bedingham – 50 (80)
- Marco Jansen – 52 (71)
Ackerman’s aggressive 95 was particularly important, with his scoring rate of 101.06 providing momentum. Markram offered stability, while Bedingham’s half-century helped consolidate the innings.
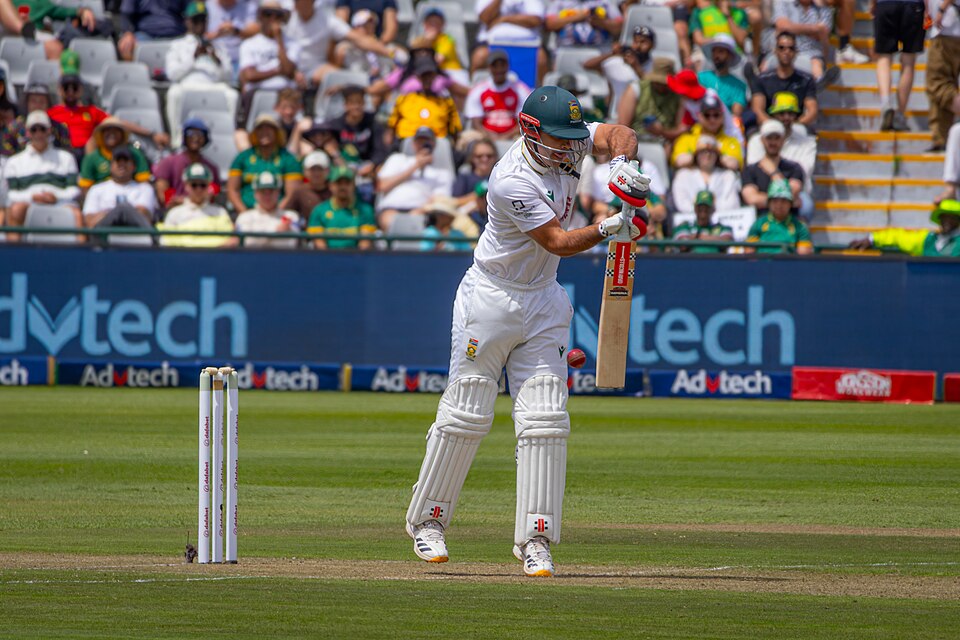
Photo: David Bedingham during the Newlands Test. © EGilham, CC BY-SA 4.0. Source and licence.

However, South Africa lost their final four wickets for just one run, an important phase that prevented them from reaching a significantly higher total.
Australian bowling assessment:
Mitchell Starc was the standout performer, finishing with 6/72. His ability to strike repeatedly through the lower order prevented South Africa from building a more substantial first-innings score.
Australia – First Innings: 429 all out
Australia responded strongly, taking a 100-run lead.
Key contributions:
- Matt Renshaw – 74 (139)
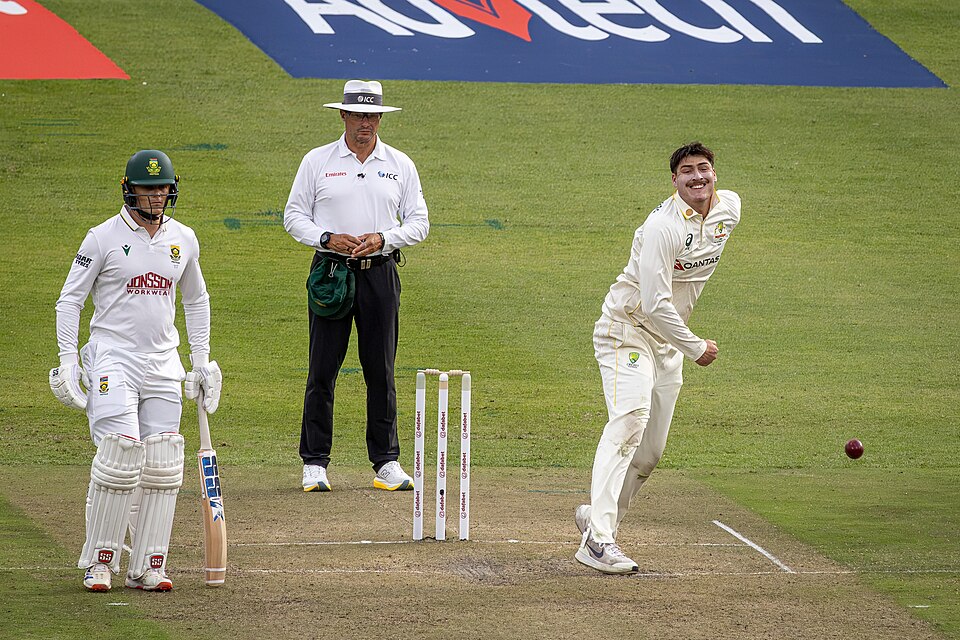
Photo: Matt Renshaw during the Newlands Test. © EGilham, CC BY-SA 4.0. Source and licence.

- Cameron Green – 65 (110)
- Josh Inglis – 102 (135)
- Alex Carey – 80 (168)
Josh Inglis produced an important century, while Carey’s 80 provided further stability. Their contributions helped Australia move from a competitive position into a commanding first-innings lead.
The partnership between Inglis and Carey was particularly significant because it allowed Australia to maintain control after South Africa had already made several breakthroughs.
South African bowling assessment:
Simon Harmer’s four-wicket contribution and Marco Jansen’s ability to break partnerships helped prevent Australia from extending their lead further.
South Africa – Second Innings: 387 all out
This was the defining innings of the match.
South Africa began their second innings under pressure, with Australia holding a 100-run advantage. Early wickets meant the hosts needed a significant partnership to prevent Australia from taking control of the series.
Marques Ackerman’s 62 and Matthew Breetzke’s 43 provided resistance, but the defining contributions came from Ryan Rickelton and Wiaan Mulder.
- Ryan Rickelton – 101 (219)
- Wiaan Mulder – 115 (221)
- Matthew Breetzke – 43 (121)
- Marques Ackerman – 62 (80)
Rickelton and Mulder approached the situation with patience and discipline. Rather than attempting to recover the deficit through aggressive scoring, they focused on building an innings and making Australia work for every wicket.
Their centuries transformed a vulnerable position into a match-winning opportunity.
The innings lasted 134.4 overs, demonstrating the amount of time South Africa invested in reversing the momentum.
Australian bowling assessment:
Pat Cummins took 2/71, while Mitchell Starc finished with 3/65. However, Australia struggled to break the Rickelton–Mulder resistance quickly enough.
Australia – Second Innings: 111 all out
Australia entered the final innings requiring 288 runs for victory.
The chase began disastrously.
Kagiso Rabada struck early, removing Matt Renshaw, Marnus Labuschagne and Travis Head. Australia quickly found themselves under pressure at 22/3.
Simon Harmer then took control of the innings.
Key contributions:
- Cameron Green – 27 (110)
- Nathan Lyon – 33* (57)
- Pat Cummins – 11 (90)
Harmer finished with remarkable figures of 6/16, dismantling the Australian batting order.
Australia were eventually dismissed for 111, giving South Africa a convincing victory.
3. KEY TURNING POINTS
-
Australia’s first-innings lead
Australia’s 429 gave them a 100-run advantage and placed South Africa under pressure. At that stage, the visitors had a strong opportunity to control the match.
-
Rickelton and Mulder’s centuries
The third innings changed everything. Their 101 and 115 provided the foundation for South Africa’s recovery and transformed a 100-run deficit into a target of 288.
-
Rabada’s opening burst
Rabada’s early breakthroughs on the final morning prevented Australia from establishing a partnership and immediately increased the pressure on the middle order.

Photo: Kagiso Rabada during the Newlands Test. © EGilham, CC BY-SA 4.0. Source and licence.

-
Harmer’s six-wicket spell
Harmer’s 6/16 was the decisive bowling performance. His control, variation and ability to extract turn made the final innings extremely difficult for Australia.
4. TACTICAL AND CAPTAINCY ANALYSIS
South Africa
South Africa’s biggest strength was their ability to adjust to the changing match situation.
After conceding a 100-run lead, the batting approach in the third innings prioritised occupying the crease and building partnerships.
The use of Simon Harmer became particularly important in the final innings. His performance demonstrated the value of having a specialist spinner capable of exploiting the conditions when the match reached its decisive stage.
The combination of Rabada’s early pace threat and Harmer’s control created pressure from both ends.
Australia
Australia displayed considerable batting strength in their first innings, with Inglis, Carey, Green and Renshaw making important contributions.
However, their second-innings batting exposed a major weakness: the inability to respond to sustained pressure after losing early wickets.
Green’s resistance, lasting 110 deliveries, showed that occupying the crease was possible. However, Australia lacked the partnerships needed to make a realistic attempt at the target.
The contrast between Australia’s two innings was one of the most important aspects of the match.
5. STATISTICAL INSIGHTS
| Statistical indicator | Performance |
|---|---|
| Highest team total | Australia – 429 |
| Highest individual score | Wiaan Mulder – 115 |
| Second-highest individual score | Josh Inglis – 102 |
| Best bowling figures | Simon Harmer – 6/16 |
| Most wickets in an innings | Mitchell Starc – 6/72 |
| Target for Australia | 288 |
| Australia final total | 111 |
Important analytical observation:
Australia scored 429 in their first innings but managed only 111 in the fourth innings. This difference of 318 runs highlights the impact of match pressure, changing conditions and South Africa’s bowling execution.
South Africa’s 387 in the third innings was also particularly significant because it came after they had conceded a first-innings lead.
6. PLAYER PERFORMANCE ASSESSMENT
Simon Harmer – Match-defining performance
Harmer’s 6/16 was the standout individual bowling contribution. His spell turned South Africa’s strong position into a decisive victory.

Photo: Simon Harmer during the Newlands Test. © EGilham, CC BY-SA 4.0. Source and licence.

Wiaan Mulder – Crucial batting contribution
Mulder’s 115 was central to South Africa’s recovery. His ability to remain at the crease for 221 deliveries helped establish a challenging target.
Ryan Rickelton – Foundation of the recovery
Rickelton’s 101 was a major contribution under pressure. His innings provided the stability required for South Africa to build a substantial third-innings total.
Josh Inglis – Australia’s standout batter
Inglis’ 102 was a significant contribution in Australia’s first innings and helped establish their 100-run lead.
Mitchell Starc – Australia’s leading bowler
Starc’s 6/72 in the first innings demonstrated his wicket-taking ability, although Australia ultimately could not maintain that advantage.
7. FINAL ANALYST ASSESSMENT
South Africa’s victory was not simply the result of one exceptional bowling spell. It was built through a series of important contributions across different phases of the match.
Australia had the advantage after the first innings, but South Africa responded with discipline and resilience. Rickelton and Mulder’s centuries changed the batting narrative, while Rabada and Harmer ensured that Australia could not recover during the final innings.
The most important difference between the two teams was their response to pressure.
Australia demonstrated their ability to dominate when conditions and momentum were in their favour. South Africa demonstrated their ability to rebuild when the match was moving away from them.
Final verdict: South Africa won the tactical battle in the final two innings. Their batting resilience and bowling execution turned a 100-run first-innings deficit into a 176-run victory and secured the series 2–1.
Prepared by: S. Darshiel Bhat
Specialisation: Cricket Match Analysis | Tactical Analysis | Statistical Analysis
Report type: Post-match analytical report